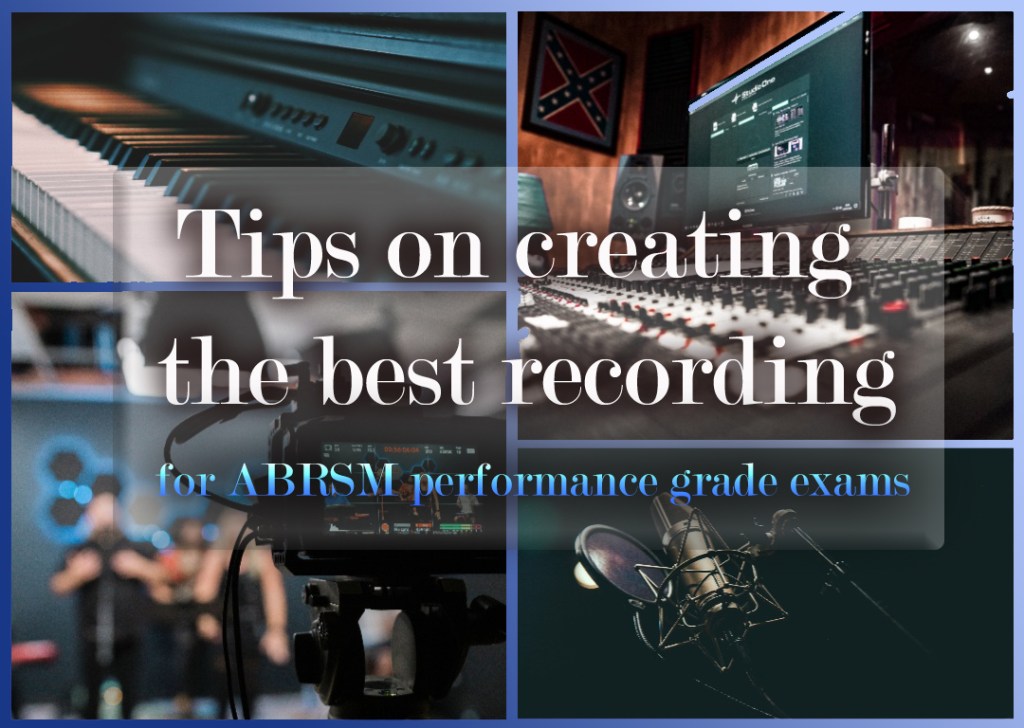
After recording my own playing for years, and as more and more students are opting to take the ABRSM performance grade exams, I am compelled to write this to help students achieve and submit a better recording for their exam. Note that what I write here is not a repetition of the recording guidelines given by ABRSM (which you should also follow), but a highlight of the important guidelines and from my own experience in recording my own and my student’s playing and also preparing them for the performance grade exams. I am writing this with the aim to help students and parents become more independent in doing their exam recording themselves (and not rely so much on the teacher) and also achieve the best result that they deserve for their exam (read point #8 for the reason why). Of course, for my own students, I will help in every aspect of the exam so that all students (and parents) need to do is to press the recording button and start recording. This article will also be beneficial to teachers who have little or no experience in recording for digital exams.
Before you start recording, do make sure that you have these items available
1) A satisfactory instrument to record on, preferably an exam model in good condition and well tuned. This is self-explanatory, but if you’re not sure why, read point #9.
2) A sturdy tripod stand for your phone. Click here to buy from Shopee.
3) Original exam piece book and/or alternative publications for your chosen pieces. Photocopies are not allowed in the exam.
Before you try to record the whole programme, practice recording your pieces separately yourself
Playing for a recording is different from playing for your teacher, or your regular practice. During a recording, just like any other performance, you will get nervous. And the tendency to mess up will increase. You realize that you may need more takes than expected just to play through a piece without mistakes in a recording. When you hear yourself play in the recording, you might be able to hear some of the mistakes that you never realize while you are playing. You might also need to adjust your dynamics and change the way you play because your recording equipment may capture the dynamics differently from how you hear it live. I’ve realized, when recording my own playing that I need to add the una corda pedal when I usually don’t need to during live performance, because my phone mic amplifies my soft playing. And this is the reason why I organize performance classes/recitals for my students to improve their playing in a performance or recording setting. Also, recording 1 piece is very different from recording all 4 pieces in one take, especially for higher grades. That is why I do not recommend students try and record the whole programme before they are ready or without trying to record piece by piece first. A lot of people tend to overestimate how ready they are for the exam (read point no. 7) You should start from recording 1 piece and gradually increase the number of pieces in one take to increase your stamina of playing through all 4 pieces.
Take note of the ABRSM guidelines in recording
Here’s a summary and highlight of what is required.
- Use a handphone tripod or a music stand so that your phone could be held steadily throughout the recording. Handphone tripods can be as cheap as $10 or less if bought online. It may be a bit tricky to adjust to the correct angle using a music stand but it is achievable. It is not advisable to use your hand to hold the phone especially if your whole programme plus introduction is more than 3 minutes.
- If you are using a front facing (selfie) camera to record, remember to uncheck “save selfies as previewed” in camera settings so that the video would not be a mirror image.
- Guidance for performance grades exam (pdf)
- Youtube link for performance grades recording guidance
- For grades 6-8, you are allowed to have a page turner. For pieces with 3 pages, you are allowed to photocopy one of the pages and place it together with the other 2 pages to avoid turning pages. I would highly recommend this as turning the pages yourself might disrupt continuity in your playing and also is distracting in a performance setting (some examiners may comment on that).
- Do wait for at least 5 seconds (excluding page turning) in between each piece. In a performance setting, this would be the time taken for applauses. This is also the most common flaw that candidates overlook that examiners always comment on.
- Remember to switch your phone to silent (non vibrating) mode before recording and turn off all notifications. Check that your phone have enough battery and memory before you start. Save your recording in MP4 format as other formats may not be assessable in some computers (usually default format for android phones is MP4). Your filename should not contain any spaces and should not be blank, or else the video will not upload successfully.
It is important to check the recording quality before you do the actual recording
Examiners will mark according to what they hear and see and will not take into consideration of poor recording quality. That is why what I mentioned in point 1 is important. Here are some points that may affect your recording quality. Also, note that recordings of too high quality would result in a large file size (more than 2gb) that makes it unable to be uploaded into the ABRSM portal for submission.
- Using a laptop, tablet, or even an old DSLR to record may not be better than using your phone. Cameras in laptops are generally used for video calling so usually good cameras are not installed in laptops. Same for tablets. Manufacturers know most people will use a smartphone camera more than a tablet camera, so they install more expensive, higher-quality cameras in their phones. If you are using an old digital camera, chances are that your phone camera is better than that. With the advancing technology nowadays, the photos and videos taken by a phone are getting more and more impressive that they could even replace DSLRs. And a lot of us upgrade our phones every few years, don’t we?
- Remember not to record too close or too far away from the performer. The camera should be ideally about 1.5 meters away from the performer/instrument. If you can put the camera at a distance where you can capture the whole keyboard with pedals, there is no need to use the zoom function. If you need to use the zoom-in function, note that most phone cameras have a default setting that matches the camera zoom with the mic zoom. So, if you are zooming-in, you may need to switch off this function (under settings –> videos –> advanced recording options) if you think that it is too loud. If there is a space constraint and you need to record closer than 1.5 meters and choose to zoom out, you can keep this setting on.
- It is important to check your room acoustics before you do your actual recording. I have a few students who have large or loud-sounding pianos placed in small rooms or apartments and the room acoustics was really not good as there were lots of echoes. Some of you may not realize this as you have not played or recorded yourself on more than one piano or location, but your teacher will most likely be able to hear it. So, it is important to do a sound check by recording at least one of your pieces and send it to your teacher. If you have a loud sounding piano, you can place the camera further away, zoom-in with the mic zoom matching the camera zoom switched off.
- You should ideally place the camera on the right side instead of your left so that the camera mic captures the treble more than the bass. If this is not possible, you might need to play your bass notes much softer, use the una corda pedal, or record further away from the piano. Usually the bass notes are already louder than treble notes and so naturally they will overpower treble notes if everything it played with equal volume/velocity. However, depending on the piano used, the placement of the camera and the room acoustics, this may or may not be obvious. That’s why it’s important to do a sound check like what I’ve mentioned in the previous point.
- Close the windows, draw the curtains and switch off any fans to prevent capturing any white noise when recording.
Your last recording may not be your best recording
This is especially so if you wait until the week before your deadline before you start recording and/or do your recording last minute on the day of submission. Especially for higher grades where the pieces are longer and require more stamina to play through all 4, when you get tired doing many re-takes to capture your best performance, you will not be in a good condition to give your best eventually and may end up overlooking important details and expression in your playing just to get the 4 pieces done without any breakdowns. There is an article stating that it is advisable to reduce your intensity of practice and not to play through your whole programme on the day of the performance to reduce burnout and I couldn’t agree more to this. Click here to read more on the article. Also, for higher grades, it is advisable to take more time in between pieces in order to get into the mood of the next piece and to play it at the correct speed. (Examiners often comment on this for performance grades) When you move from a fast piece to a slow piece, you need to take time in between to regulate your heartbeat so that you will not end up playing the slow piece faster than it is supposed to be.
If you want to depend on luck to get a good recording done, you are still not ready to do a recording yet.
If you are really well prepared for the exam, you may not need a lot of takes to get a proper recording because you already have the muscle memory to play the pieces well without putting much thought into it, but if you are not prepared, you will always have mistakes here and there no many how many takes you do. That’s why I recommend point number 1 of this article – record each piece individually at home first before you attempt to record your whole programme or register for the exam. If you couldn’t even get a decent recording of your pieces separately after countless takes, it means that you still need a lot of practice, because recording all your pieces at one take without any mistakes would be much harder, especially at higher grades. Unfortunately, the Dunning-Kruger effect is real and a lot of people often overestimate how ready they are for an exam until they start recording their pieces and hear their mistakes.
Get some reviews of your recording before submitting.
This may be a no-brainer, but for those who are self-registered, please send your recording to your teacher for review at least a few days before you submit! And that is why you should not do your recording last minute (or register before you start recording) as there may not be time for your teacher to review before you submit, and it would be too late for your teacher to ask you to do a re-take and then review it again. You also need to take into consideration that your teacher may not be able to review your recording immediately due to his/her teaching schedule and other commitments. For those who self-registered, do not be over-confident and submit a recording without sending to your teacher for review. You or your parent might not be able to hear important mistakes that you make that will cause you to get a less than desired mark that your teacher will be able to hear easily.
Get a good recording first before registering
If you want to play safe and not take any chances, I would suggest that you try to get your best recording done (or at least one you’re satisfied with) before registering for any exams. Unlike physical exams where you need to wait for up to half a year after registering before you take the exams, performance grades exams are now available for booking and submission anytime and results can come in as early as a day after submission (not after the deadline) to a month, so you will only need to worry about missing the submission deadline (28 days after registration) if you have registered without having a good recording. Of course, this would mean that you have no deadline to work with, but this would be better than rushing and submitting a less than desired recording.
Record on a piano that you can play well on
If you want to record on a piano other than the one you practice on every day, make sure that you have also practiced on that piano at least a few different days. Otherwise it is more important to submit a recording on a piano that you can play well on that a piano that sounds good. From my experience preparing and submitting students for the performance grade exam, almost all students play better on their own piano (up to 1-2 grades better). Some of them can also play well on the teacher’s piano (if they are being taught in the teacher’s studio), but usually not as well as their own piano, and certainly not on a piano that they have rarely or never practiced on before (practicing on the same day of recording do not count). This is simply because they are just not used to playing on a different piano and environment – The touch and sound of different pianos can be very different, and even the height of the piano bench and the music stand matters (grand pianos have a much higher music stand than uprights). Small details in the environment such as the general atmosphere of the venue, the lighting, the temperature, and any white noise will affect how you play. And this is why I have always encouraged students to take part in festivals and recitals and to book the exam venue for practice if they are taking face-to-face exams. Of course, there are people who can sound good on any piano that they play, but they are the ones who are either 200% prepared (at international competition standard), have no stage fright, or are already at a professional level. And the higher the grade, the harder it is to get a good recording on a piano other than the one you own. So, for students taking the performance grade exam, my advice is not to put all your eggs in the same basket and only want to record at the teacher’s place, but to try recording both at home and at the teacher’s place so that he/she can at least choose a better recording. You do not want to put yourself at a disadvantage and give your teacher no choice but to choose a recording with mistakes just because you want to record on a piano that sounds better. Another reason why student’s recording tends to be better at home is because they are able to record every day, with unlimited time, but at the teacher’s studio, they are only able to record once a week, with a 1 hour limit. From my experience in preparing students for the performance grade exam, students who have no choice but to record at my place can take up to one month or longer to get a good recording (from the time that their pieces are fluent and polished to the time that they get a good recording), and for those who can record at home, I almost always choose the one that they recorded at home as their playing can be up to 1-2 grades better than the ones that they recorded elsewhere.
Submitting a recording played on a good piano does matter
I know that this kind of contradicts what I’ve said in the previous point because the teacher’s piano always sounds better than yours and it may seem better to record at the teacher’s place, but what I’m trying to point out is, if you already have a satisfactorily good piano at home, then it is better to submit a recording done at home than elsewhere because you almost always can play better at home. However, if you do not have a good piano at home (especially if you are at higher grades and own a non-exam/beginner’s model or if your piano just does not sound good, or if you own a digital piano), then you should do your recording elsewhere on a better piano. But, due to the reasons stated before, as most people sound better on their own piano, you will be at a disadvantage compared to those who own a good piano at home. So, if you really have no choice but to record elsewhere, make sure that you have practiced many times on the piano that you are recording on. Otherwise, it is better to just upgrade to a good piano.
In short, a good piano allows for
- better projection as the strings are longer and the soundboard bigger
- better control of dynamics are the touch are more even and responsive
- the examiner to hear your playing clearly. Examiners will mark according to what they hear.
Do not submit your recording last minute. Take a screenshot of the confirmation page after you have submitted your recording
This applies only to those who are self-registered and had booked the exam before they managed to get a good recording. For higher grades, it may take quite a while to upload the video into the ABRSM website, depending on your internet speed. You may only realize that you need to compress your video (if the file size exceed 2gb) when the file is not able to load when you tried to submit. Compressing a video may take hours using the free online converter. If your video submission deadline happen to be on a day with high registration or submission traffic, you may have problem logging in to the ABRSM portal due to high traffic and it may take hours before you can log in. If you have problem uploading, try using a PC or laptop with a lan connection instead of Wi-Fi. Take a screenshot of the confirmation page just to double confirm that you have submitted the recording and the exam board has received your submission.
disclaimer: There is no need to follow every single technical requirement stated in this article, as long as the basic requirements are met (the whole keyboard with pedals can be seen in the recording, recorded at 720p in one continuous take). And the most challenging aspect of the recording process is NOT the technical requirements, but to be able to record all 4 pieces in 1 take without mistakes. All the best in achieving the best recording for your exams!
If you think that this is worth it, buy me a coffee
Like this article? Check out my article on How to get a distinction for ABRSM performance grade exams.
Click here to see my student’s achievements for past-year ABRSM exams.
You might also like to read
Common Misconceptions about Learning Piano
What you need to know about ABRSM Exams
Should I take ABRSM Practical or Performance Grade Exam?
How to get a distinction for ABRSM Performance Grade Exams
ABRSM Marking Criteria
Aureus Music School Piano Lesson Aureus Academy Yamaha Cristofori Mandaville ABRSM Singapore Tampines NAFA SYT Piano Teacher Lasalle SOTA Yong Siew Toh The Happy Pianist Aureus Conservatory Kawai Music School Steinway STEP Steinway Singapore
